Several of our bra patterns use fold-over elastic as binding along their neckline and/or underarm edges. In the case of panties, it’s used on either legs or waistline (or both). Fold-over elastic, or FOE for short, is a viable alternative to elastic trim. It’s great for those who prefer a clean, tailored look to the edges, or for those who wish to introduce a contrast colour as a frame for the main fabric.
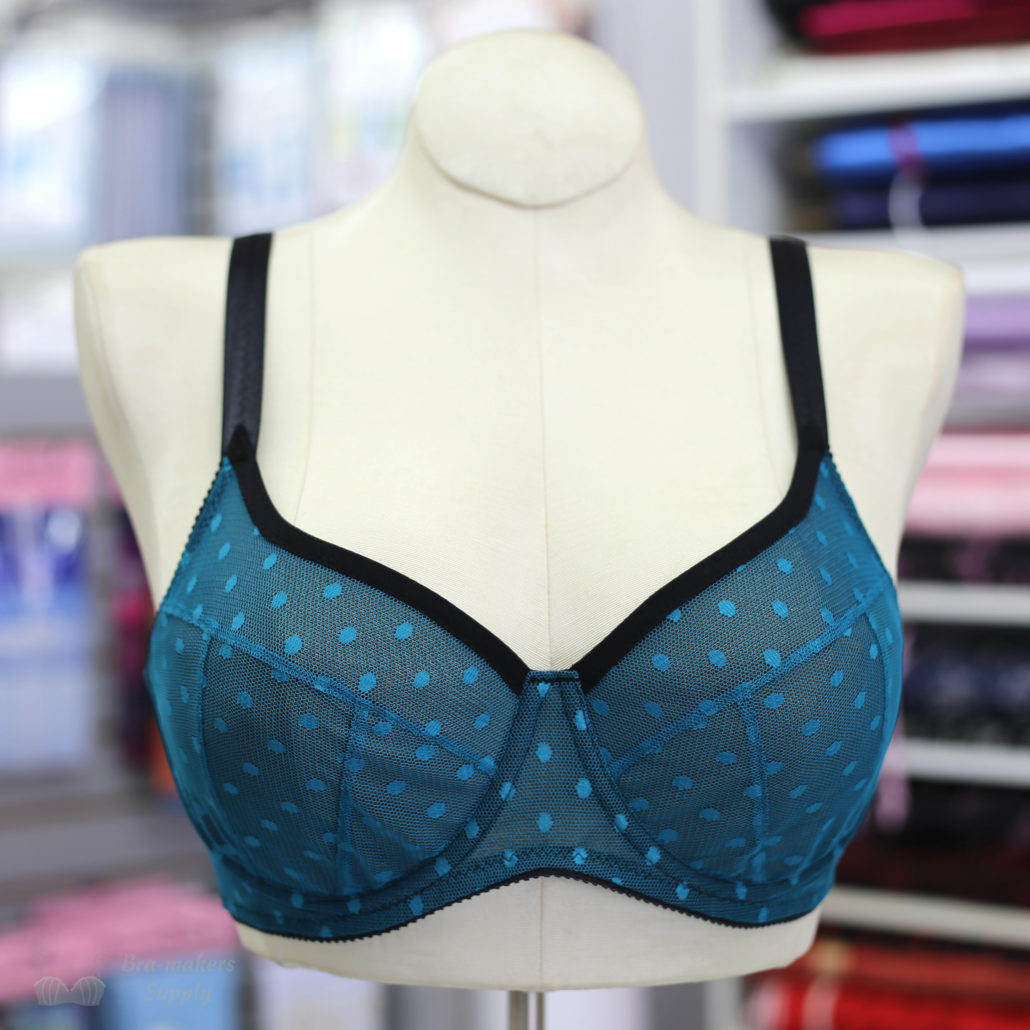
You can use fold-over elastic as an alternative on any edge that currently uses 1/4″ to 1/2″ (6-12 mm) wide elastic. But there is a bit of preparation to do to the pattern first. If your pattern was designed for regular elastic trim, you need to remove the elastic turn-under allowance from that edge in order to use FOE. That’s because FOE sews at the level of the finished edge; it never turns under. There is no second layer of fabric bulk along that edge.
Here’s a Classic bra neckline with the 3/8″ elastic allowance removed in preparation for FOE. You would also remove the same amount along one long edge of the front fabric strap.

Fold-over elastic is available in several widths, from the tiniest 3/16″ (2.5 mm) up to a substantial 3/4″ (18 mm) width. I find that for most bra fabrics, the FOE that finishes to 3/8″ (9 mm) works consistently well. A width smaller than that tends to be difficult to sew on for most, while the wider ones do not curve nicely around curves. So we tend to use the 3/8″ (9 mm) for all of our projects. Lucky for us…we also sell it here!
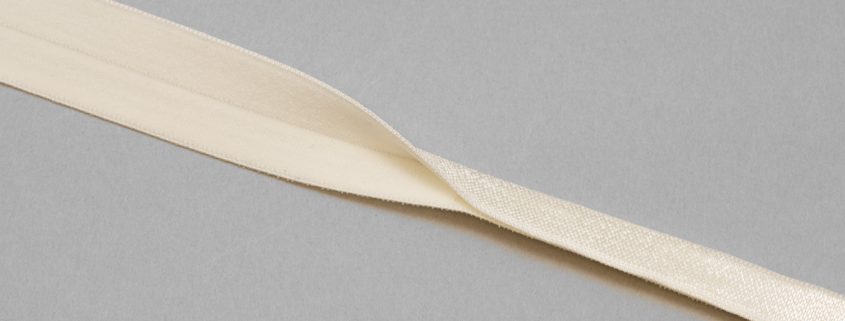
Most FOEs are also reversible, showing off a shiny side or a matte side depending on the way you use it. The matte side has a very suede-like appearance and is perfect for non-shiny or more tailored-looking fabrics. If you haven’t tried the matte side of FOE, maybe you should!
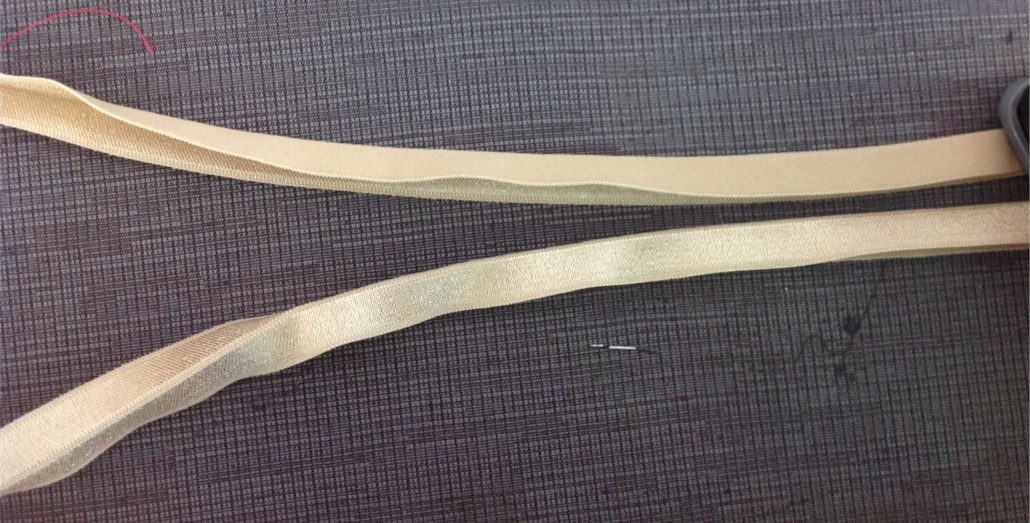
We always press our FOE in half prior to sewing it on the edge. This makes the application process so much easier.
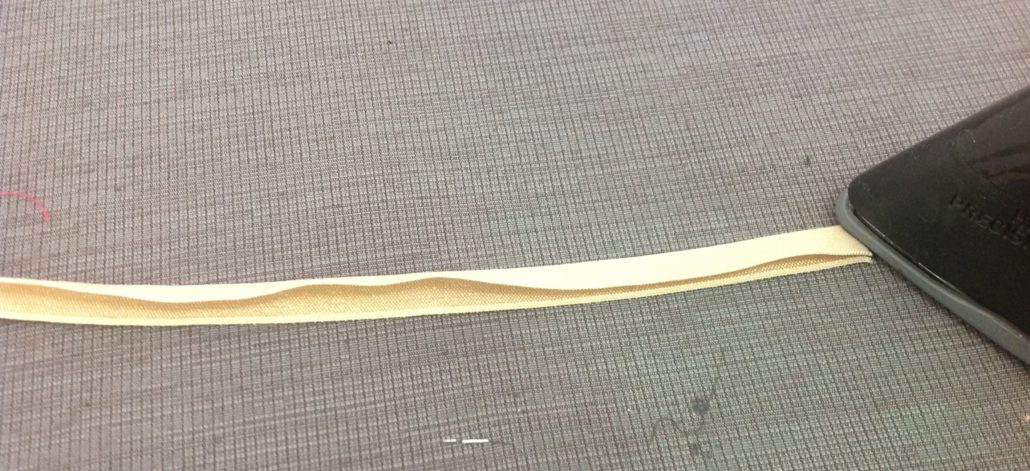
There are many ways to apply the fold-over elastic binding; here are the most common.
Sew with two passes
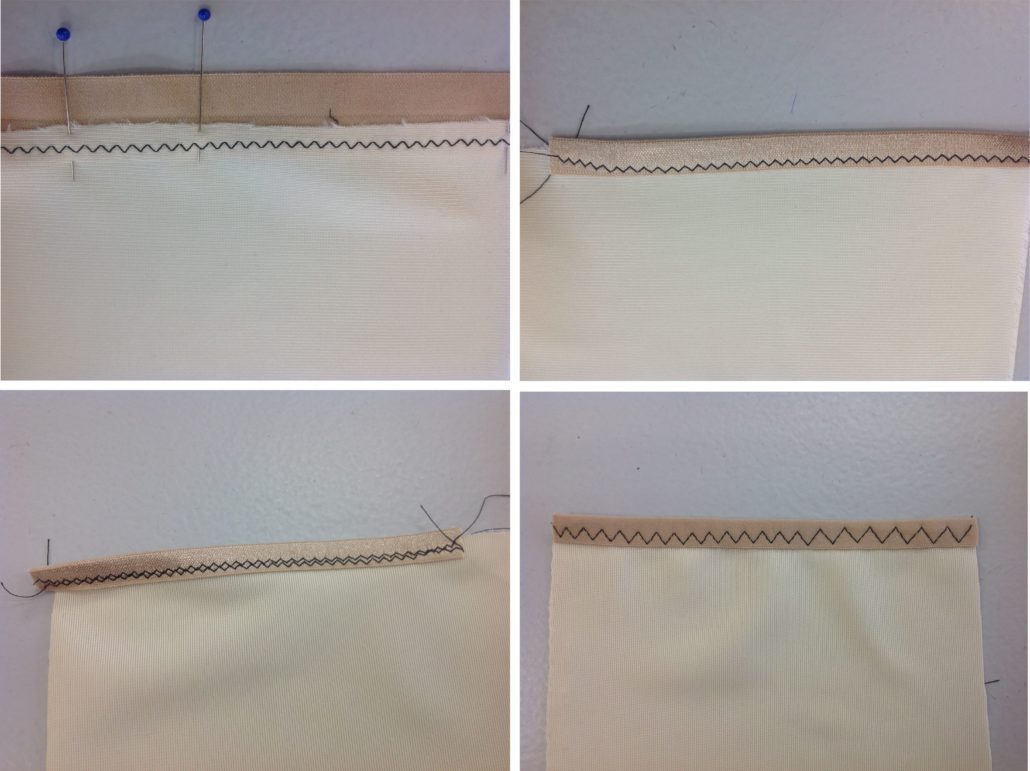
This is likely the most common method of sewing on FOE. leave the FOE open (no pressing). Pin and sew the FOE to the wrong side of the edge using a small zig-zag (width 2, length 2). Wrap the binding to the front of the garment, and stitch again with the same stitch. You can use a zig-zag or a three-step zig-zag as shown at bottom right.
Advantage: you can see what you are sewing at all times.
Disadvantage: two times the sewing (is that a bad thing?) Also the stitches from both passes are visible on the wrong side of the garment.
One pass (with a little help)
If you want to sew fold-over using only one pass of the sewing machine, why not try adhesives? You can use either a glue stick…

…or Wonder Tape to hold the FOE to the edge of the fabric.
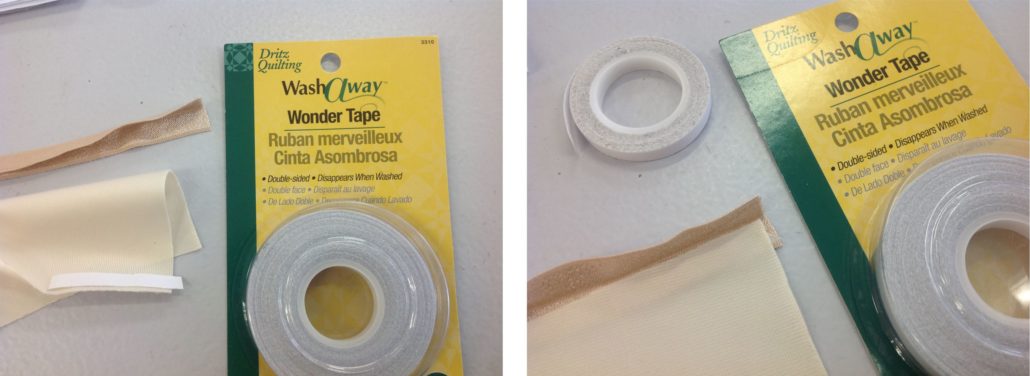
In both cases, apply the adhesive to the fabric, not the FOE. The adhesive is best applied to the wrong side of the fabric too – it is much easier to sew knowing the back side is held firmly in place. Don’t worry about stiffness with either product; they both dissolve completely in the first wash.
What about those joins?
You may not always be able to sew the fold-over binding to a flat edge, then sew a seam to finish the ends; for example, a neckline with a zipper in the front. But what if you want to sew the FOE in the round, such as on an armhole or a scoop neck pullover sports bra, or even waistline or legs of panties?
In this case, you need to sew the FOE together before you sew it on. There are two ways to join fold-over elastic and both are good. In both cases, measure the length of the edge, then subtract 1″ (25 mm) from that and cut the FOE to that length. The seam allowance is included.
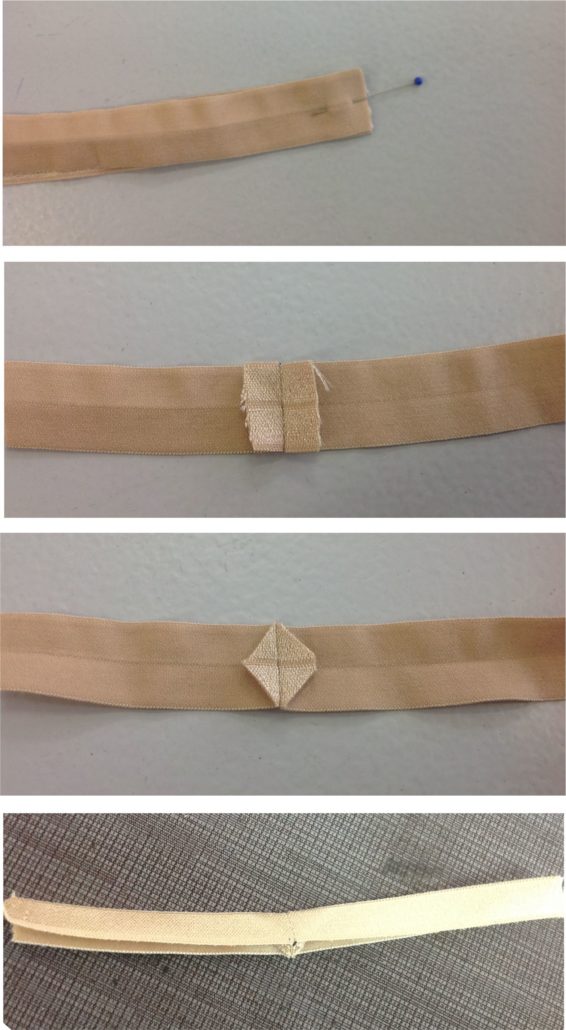
The first join is the straight join and it is just like it sounds. Sew across the ends of the FOE, then sew it to the edge, pinning as you go to make sure it stays put around the curves. As you can see, you can trim the edges of the seam for less bulk.
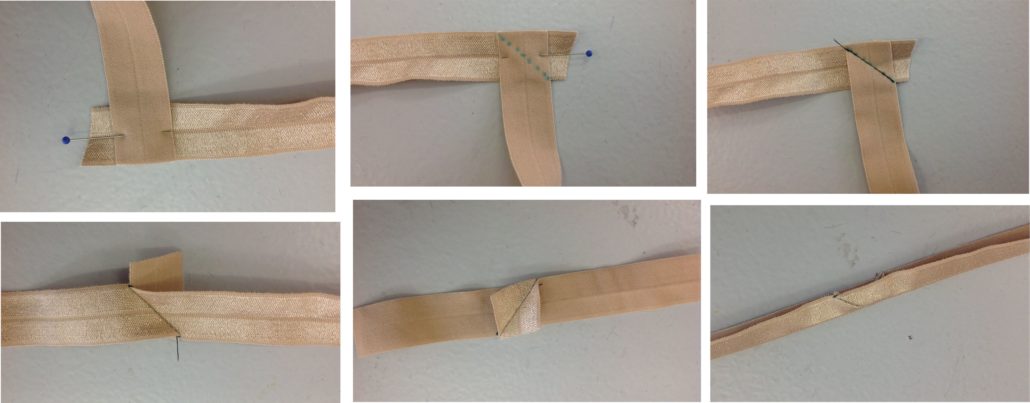
You can also do a mitered join, or a bias join as it is often called. The two ends are crossed at a ninety-degree angle, then sew from point to point where the top fabric crosses the bottom. If you sew exactly from one intersection to the other, the join will be perfect. Trim any excess from the seam and carry on.
Sewing the Fold-over Elastic
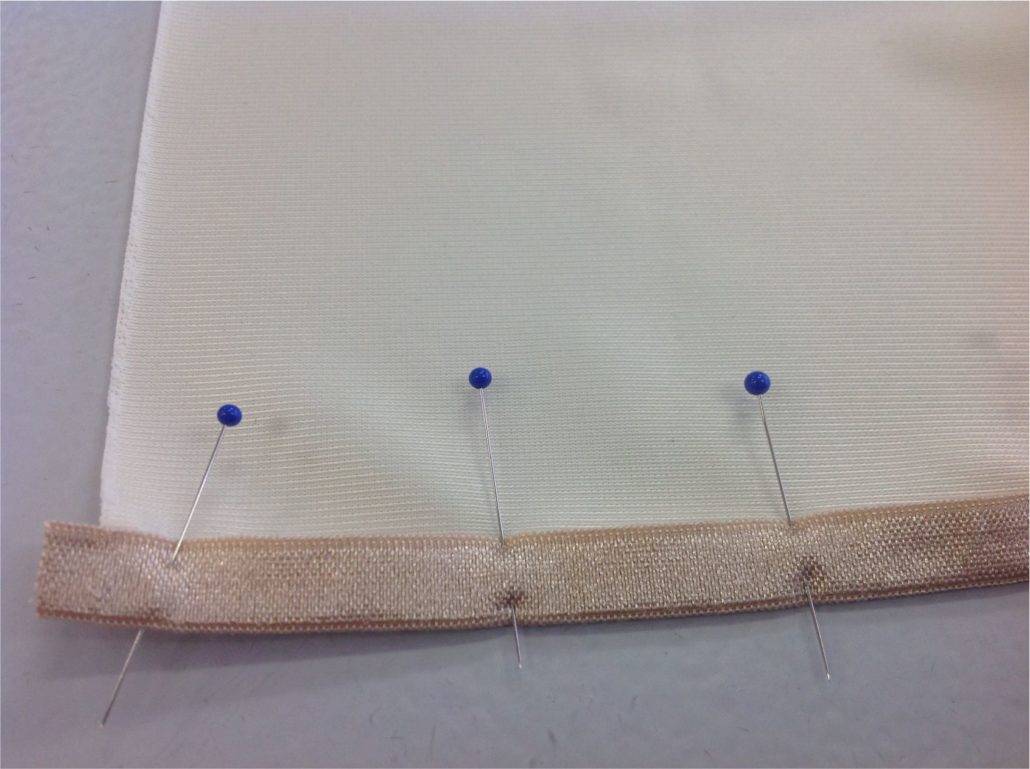
Pinning helps, especially on those curves. Even with glue and/or Wonder Tape, you will find pins useful.
In preparation for sewing, set your machine up for a zig-zag stitch with a length and width of 2 mm. If you prefer a three-step zig-zag, you may want a width of 3.5 mm to 4 mm and a length of 1 mm to 1.5 mm. All machines vary slightly and always test a scrap of fold-over and fabric to make sure the elastic lies smoothly after stitching, and the edge of the fabric does not wave or cup inward.
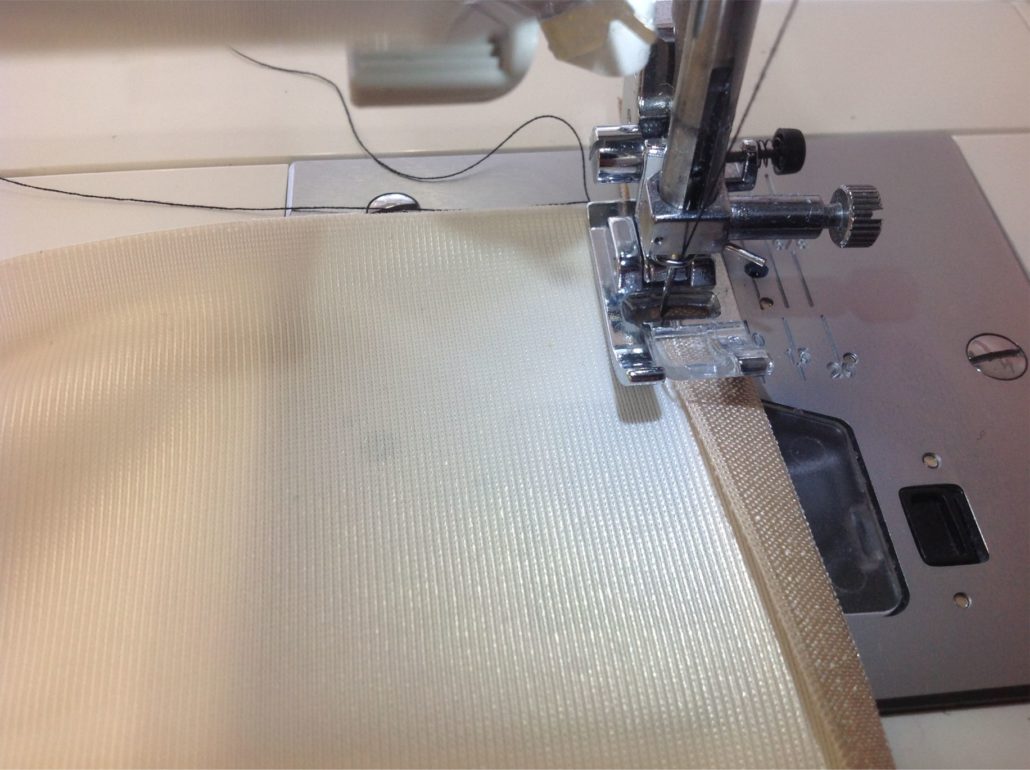
Align the left edge of the fold-over with the inner edge of the “hole” in the presser foot, so the stitching rides along the edge of the fold-over.
Happy stitching!



This is a great tutorial on how to use fold-over elastic for bra-making. I’ve never used this type of elastic before, but this tutorial makes it easy to understand. Thanks for sharing!
When applying FOE to the top of the ruby bra, are you meant to put tension on it? I can’t find a video of you using FOE in the bluprint classes.
I want to use FOE for the panties I’m making with the help of your Bluprint class. FOE because I have a big supply of it. I have trouble deciding the correct length needed gor the leg openings. Using the method decribed (minus 2 inches at the back) would make it painfully stretched. No reduction at all, is that done? TIA, Femke
If you don’t reduce at all on the bum dip, it will be baggy in that area, and not stay put when you bend or walk. If you have reduced the fabric by 20-30% when you drafted your patterns, reducing by 2″ (depending on the firmness of the elastic of course) will provide the right amount of pull in the bum dip area. You can always use a large zig-zag to sew on the elastic to test that length of leg elastic and assess the fit.
Hi, what is the best needle to use when sewing FOE?
Thanks
We love the Schmetz Stretch 75!
Thanks for sharing this, its helpful to those who are interested to learn to sew bras. Kudos!